Creating a product is not just about software; hardware plays a crucial role as well. Specifically, in computer vision, we need compact edge hardware to deploy our object detection models or algorithms. Edge devices are computing hardware positioned at the periphery of networks, close to data sources and end users. These devices reduce latency and bandwidth usage by processing data locally (at the “edge”), enabling real-time responsiveness in a compact size. Raspberry Pi is one of the most widely used edge devices, and OpenCV is the most widely used computer vision library. So, let’s see how we can use Raspberry Pi with OpenCV to deploy applications locally on edge, making it accessible to everyone.
In this article, we will set up a Raspberry Pi and install all the necessary dependencies to create an OpenCV environment.
Exiting! Let’s get started.
Introduction to Raspberry Pi
Raspberry Pi is a credit-card-sized computer that can perform various computing tasks typically handled by desktops and servers. It runs on an ARM-based processor and supports multiple operating systems, primarily Raspberry Pi OS (formerly Raspbian), a Debian-based Linux distribution. With built-in GPIO (General Purpose Input/Output) pins, networking capabilities, and support for peripherals like cameras and sensors, the Raspberry Pi is an ideal choice for hobbyists, educators, and professionals looking for a cost-effective computing solution.
But before diving into the Raspberry Pi specifications, let’s look at today’s global edge computing market.

The edge computing market is experiencing rapid growth as organizations adopt distributed computing. Global spending on edge computing is surging: IDC estimates that enterprise and service provider expenditures will reach $206 billion by 2032 and grow to around $378 billion by 2040.
The reason for this adoption is the rapid evolution of AR/VR, 3D, IoT, 5G, and more. Therefore, learning about edge computing is not only beneficial for technical knowledge but also helps keep you relevant in the industry. Our goal will be to learn about setting up Raspberry Pi and use it to run applications on the edge!
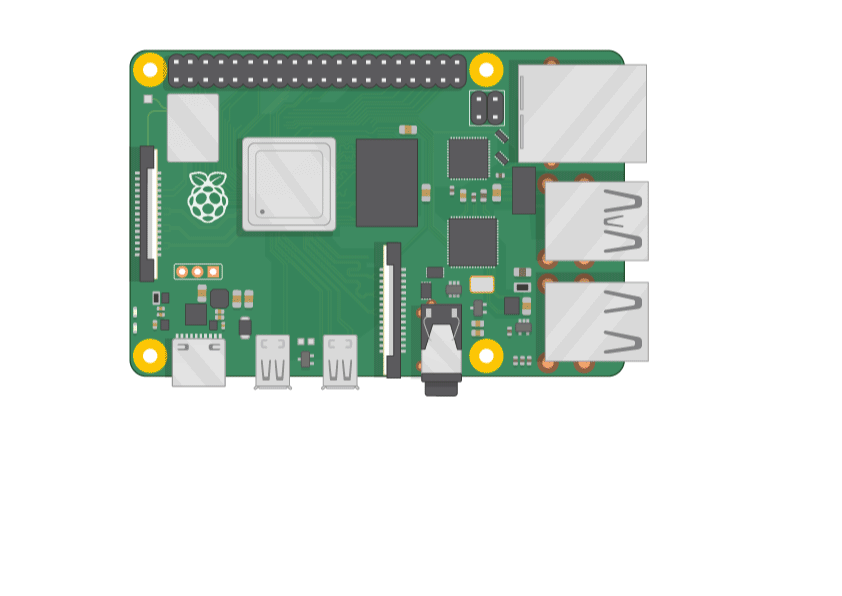
Now, let’s come back to Raspberry Pi. Since its launch in 2012, Raspberry Pi has evolved significantly. Over 60 million units have been sold worldwide, making it one of the most popular computers ever made. We will use the latest Raspberry Pi 5 in our articles. It has a 2.4 GHz Cortex-A76 processor, enhanced GPU (VideoCore VII), and improved connectivity with PCIe support. Also, it’s super cheap, starting at just $50, which makes computing accessible to everyone.
Setting Up Your Raspberry Pi
There are two main steps involved:
Install and Flash the Raspberry Pi OS
First, you need to install the rpi-imager. There are two ways:
- Download the latest version from raspberrypi.com/software and run the installer.
- Install it from a terminal using your package manager: sudo apt install rpi-imager.
Once you’ve installed Imager, launch the application by clicking the Raspberry Pi Imager icon or running rpi-imager.
Now, we need an SD card to install and execute our Raspberry Pi OS. We are using a Sandisk Ultra 64 GB card for this article.
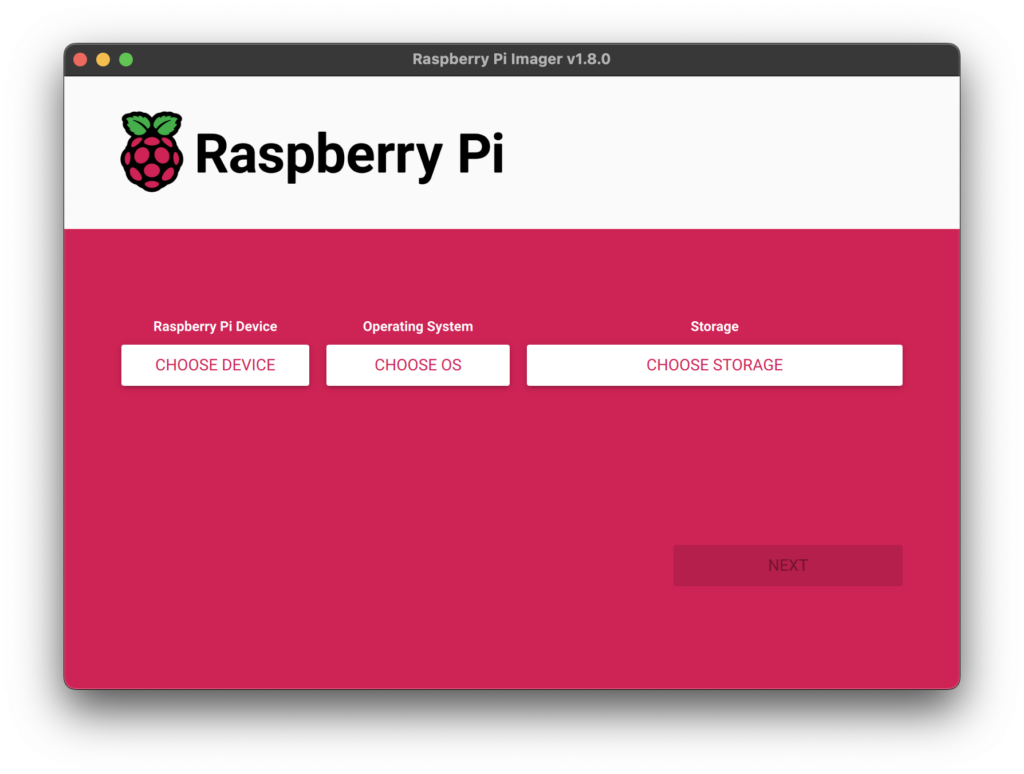
Now, we have to choose the device (Raspberry Pi 5), the OS (Raspberry Pi OS 64-bit), and the storage device (our SD card). Then, there will be another step:
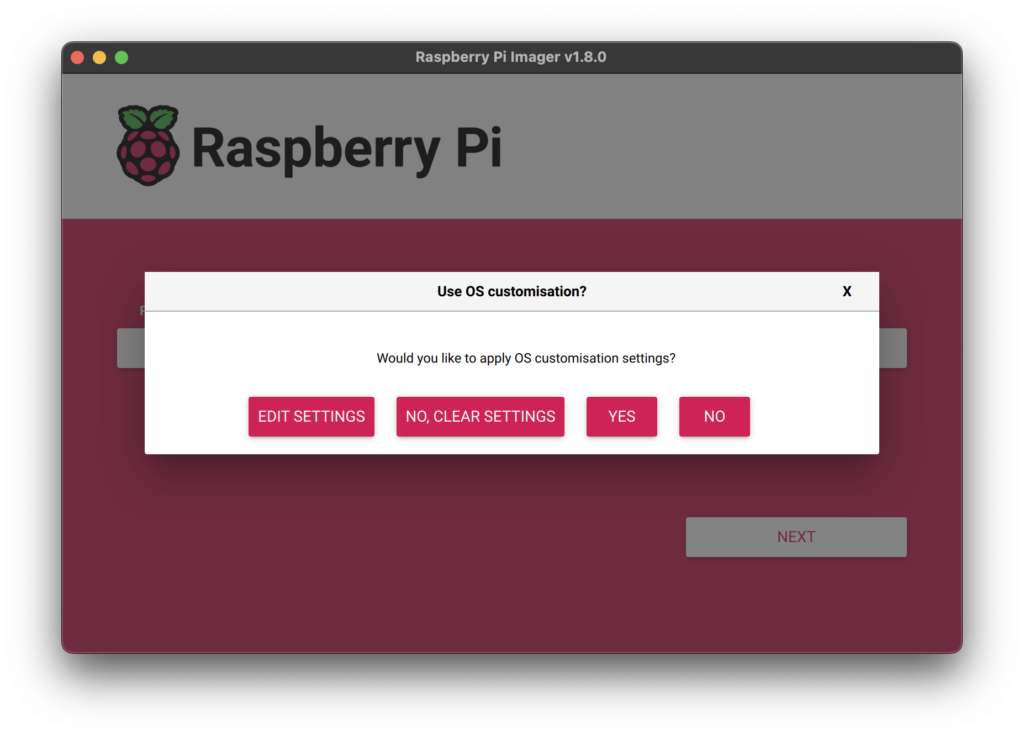
We don’t want any customization in our OS. We will click ‘NO’ and proceed. Finally, we respond ‘Yes’ to the “Are you sure you want to continue?” popup to begin writing data to the storage device.
P.S. If you see an admin prompt asking for permission to read and write to your storage medium, permit Imager to proceed.

After the installation, we will see a success message like this:
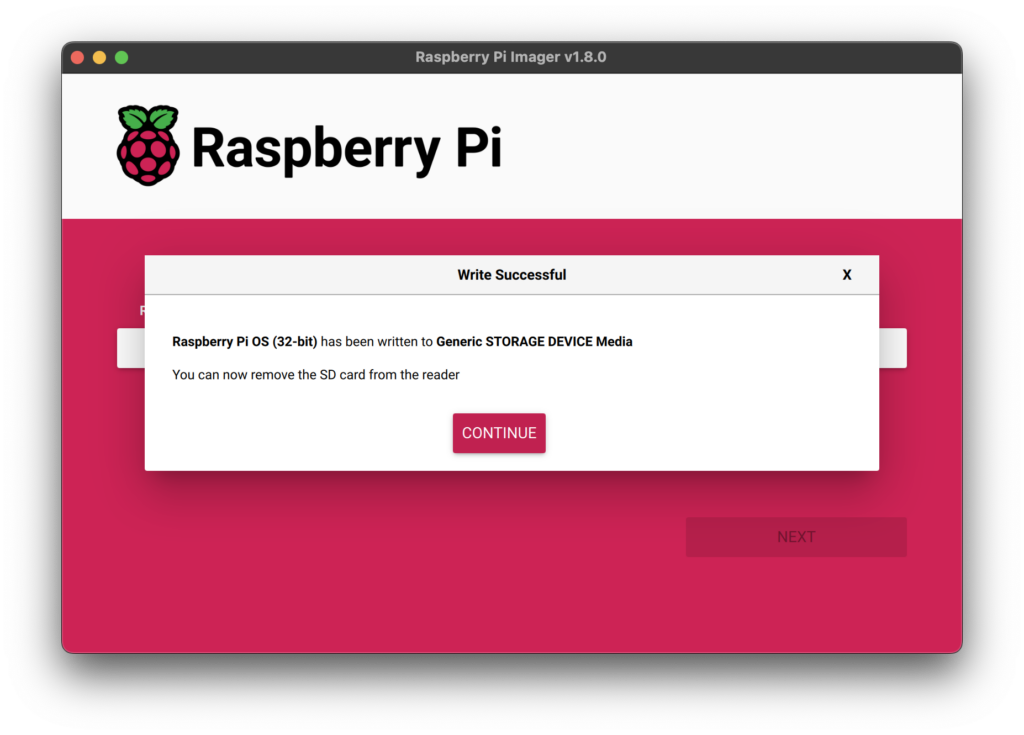
We’re now ready to boot a Raspberry Pi from the storage device!
First Boot Configuration of Raspberry Pi OS
Now, we boot the Raspberry Pi and follow the instructions:
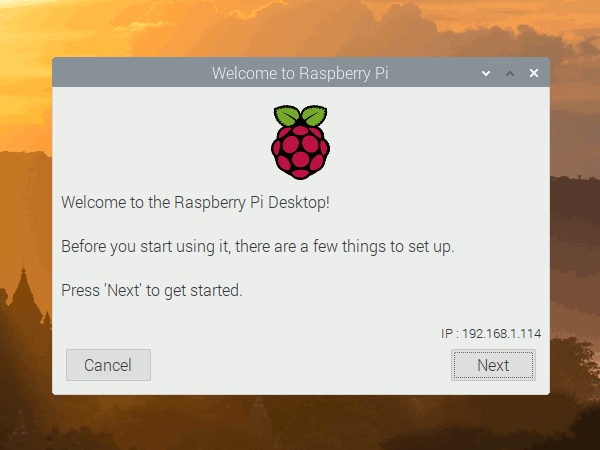
- Set Country and Language: Choose your country, language, and time zone.
- Change Password: Set a new password for the ‘pi’ user to enhance security.
- Connect to Network: Select and connect to a Wi-Fi network or LAN, if available.
- Update Software: Allow the system to check for and install the latest updates.
P.S. There will be an intermediate step that will ask you to choose between Labwc and Wayfire. Both are lightweight, Wayland-based window managers suitable for Raspberry Pi. Please choose Labwc as it’s the latest one.
There are many additional customizations available in the official Raspberry Pi documentation; you can give it a read in your spare time.
Installing Miniconda and Setting Up the Python Environment
First, we will go to the official miniconda download page. And we will select the Miniconda3-latest-Linux-aarch64.sh file. Raspberry Pi 5 uses an ARM-based processor, specifically ARMv8 (64-bit) architecture. And aarch64 refers explicitly to the 64-bit ARM architecture, which perfectly matches Raspberry Pi 5’s CPU.
We will start the process by downloading it:
mkdir -p ~/miniconda3
wget https://repo.anaconda.com/miniconda/Miniconda3-latest-Linux-aarch64.sh -O ~/miniconda3/miniconda.sh
Then install it:
bash ~/miniconda3/miniconda.sh -b -u -p ~/miniconda3
Initialize the conda environment:


~/miniconda3/bin/conda init bash
Recommended clean up:
rm -rf ~/miniconda3/miniconda.sh
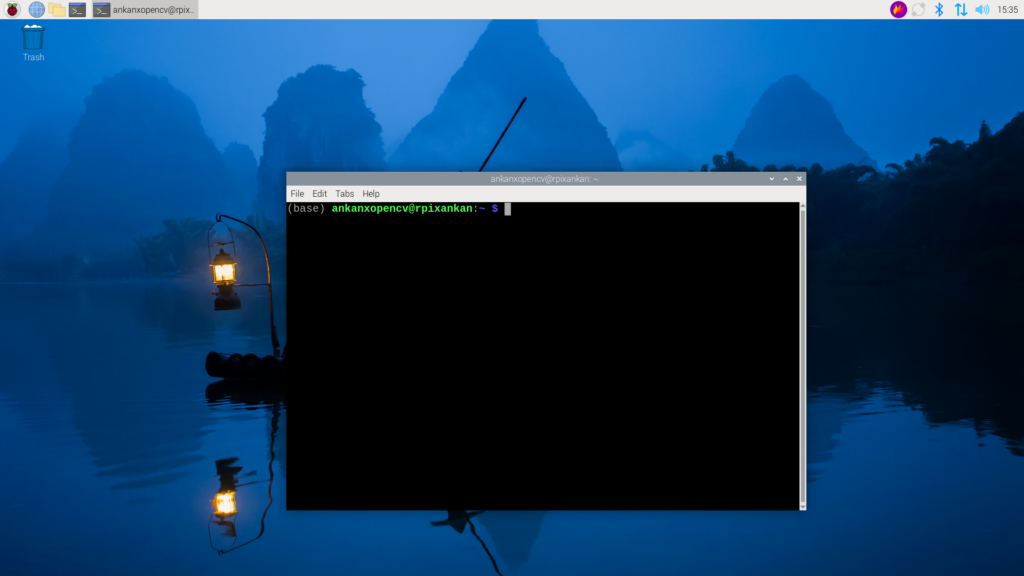
After this, open a new terminal window, and you will see the conda base environment is added to the terminal.
And our Python environment is ready now; we are all set to install OpenCV.
Installing VS Code and OpenCV
Installing VS Code
Raspberry Pi OS supports many essential applications like VS Code. We just need to select the Raspberry icon in the top left corner of the screen. Select Preferences > Recommended Software from the drop-down menu, and you’ll find the package manager.
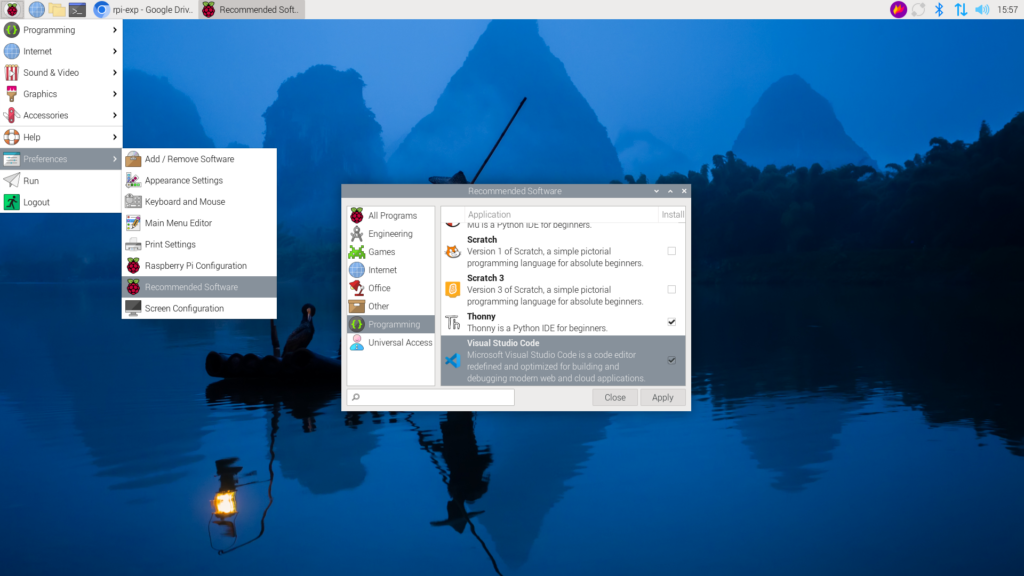
You can see the VS Code icon here; we have to select that, and it will be installed in our Raspberry Pi.
Installing OpenCV
To install OpenCV on Raspberry Pi, we first need to install the library. There are several ways to do this, but the simplest and recommended option is to use the pip package system.
Before installing any software, it is good practice to update the system. Run the following commands in the terminal:
sudo apt update
sudo apt upgrade
OpenCV requires several dependencies that we need to install first. Run the following command to install the necessary libraries:
sudo apt install build-essential cmake git libgtk-3-dev libavcodec-dev libavformat-dev libswscale-dev
Now, we will install OpenCV:
pip install opencv-python
Finally, we are all set to run our program.
Run a sample OpenCV Python Script on Raspberry Pi
So, we will run this simple Python script, reading an image with OpenCV:
import cv2
import time

# Initialize video capture
capture = cv2.VideoCapture(0)
capture.set(cv2.CAP_PROP_FRAME_WIDTH, 1024)
capture.set(cv2.CAP_PROP_FRAME_HEIGHT, 576)
capture.set(cv2.CAP_PROP_FPS, 30)  # Requesting 30 FPS from the camera

# Background subtractor
bg_subtractor = cv2.createBackgroundSubtractorMOG2()

# Current mode
mode = "normal"

# FPS calculation
prev_time = time.time()

# Video writer initialization with explicit FPS
save_fps = 15.0  # Adjust this based on your actual processing speed
fourcc = cv2.VideoWriter_fourcc(*"XVID")
out = cv2.VideoWriter("output.avi", fourcc, save_fps, (1024, 576))

while True:
    ret, frame = capture.read()
    if not ret:
        break

    frame = cv2.flip(frame, 1)
    display_frame = frame.copy()

    if mode == "threshold":
        gray = cv2.cvtColor(frame, cv2.COLOR_BGR2GRAY)
        _, display_frame = cv2.threshold(gray, 127, 255, cv2.THRESH_BINARY)
        display_frame = cv2.cvtColor(display_frame, cv2.COLOR_GRAY2BGR)

    elif mode == "edge":
        gray = cv2.cvtColor(frame, cv2.COLOR_BGR2GRAY)
        edges = cv2.Canny(gray, 100, 200)
        display_frame = cv2.cvtColor(edges, cv2.COLOR_GRAY2BGR)

    elif mode == "bg_sub":
        fg_mask = bg_subtractor.apply(frame)
        display_frame = cv2.bitwise_and(frame, frame, mask=fg_mask)

    elif mode == "contour":
        gray = cv2.cvtColor(frame, cv2.COLOR_BGR2GRAY)
        _, thresh = cv2.threshold(gray, 127, 255, cv2.THRESH_BINARY)
        contours, _ = cv2.findContours(thresh, cv2.RETR_TREE, cv2.CHAIN_APPROX_SIMPLE)
        display_frame = cv2.drawContours(frame.copy(), contours, -1, (0, 255, 0), 2)

    # Calculate actual processing FPS
    curr_time = time.time()
    processing_fps = 1 / (curr_time - prev_time)
    prev_time = curr_time

    # Display actual processing FPS
    cv2.putText(
        display_frame, f"FPS: {int(processing_fps)} Mode: {mode}", (10, 30), cv2.FONT_HERSHEY_SIMPLEX, 1, (0, 255, 0), 2
    )

    # Write frame to video
    out.write(display_frame)

    # Show video
    cv2.imshow("Live Video", display_frame)

    key = cv2.waitKey(1) & 0xFF
    if key == ord("t"):
        mode = "threshold"
    elif key == ord("e"):
        mode = "edge"
    elif key == ord("b"):
        mode = "bg_sub"
    elif key == ord("c"):
        mode = "contour"
    elif key == ord("n"):
        mode = "normal"
    elif key == ord("q"):
        break

# Clean up
capture.release()
out.release()
cv2.destroyAllWindows()
In this script, we implemented four different OpenCV algorithms widely used in image processing and computer vision.
- Thresholding
- Edge Detection
- Background Subtraction
- Contour Detection
We can play with all the different modes using different keypresses. We covered each one in detail in our Getting Started with OpenCV article series. Do give it a read later on!
To run the script:
python video.py
P.S. Before running the script, please make sure that you have connected a USB Camera with the Raspberry Pi.
The result you will see:
We’re finally at the end of our journey. By now, you’ve successfully set up a Raspberry Pi, flashed the Raspberry Pi OS onto an SD card, installed Miniconda, and created a Python environment. You’ve also installed VS Code and OpenCV and then tested a Python script using your camera to perform various live video processing tasks like edge detection, background subtraction, and contour tracing.
As edge computing continues to thrive and connect the physical and digital worlds, understanding how to work with devices like the Raspberry Pi will keep you in sync with the latest trends and innovations in the industry.
Stay tuned for the next part, where we’ll make a real-world application out of these classic OpenCV algorithms and deploy it on Raspberry Pi. Bye 😀
References
Raspberry Pi Official Documentation
All the Gifs except the inference result are taken from Google image search


5K+ Learners
Join Free VLM Bootcamp3 Hours of Learning