
Color spaces are fundamental to how digital images are represented and processed in computer vision. While the RGB (Red, Green, Blue) is the most commonly used, OpenCV supports several other color spaces like HSV (Hue, Saturation, Value), LAB (Lightness, A, B), and YCrCb (Luminance, Chroma Red, Chroma Blue), each offering unique advantages for different image processing tasks. Understanding these color spaces is essential for applications such as object detection, segmentation, color correction, and compression. In this article, we explore and visualize the most widely used color spaces and demonstrate how to work with them in both Python and C++ using OpenCV’s built-in functions.
Table of contents
Import cv2
Before using any OpenCV functions, we must first import the library. This is the essential first step to access all OpenCV functionalities.
Python
# import the cv2 library
import cv2
C++
//Include Libraries
//OpenCV's cv::Mat acts like NumPy arrays for image processing.

#include<opencv2/opencv.hpp>
#include<iostream>
We are assuming that you have already installed OpenCV on your device.
If not please refer the relevant links below:
Example Video
To better illustrate the concept of color spaces, we use a vibrant anime video as our example throughout this article. Anime scenes are known for their rich color palettes, strong contrasts, and diverse lighting effects, making them ideal for highlighting how different color spaces interpret and separate color information. By observing how the anime video transforms across RGB, HSV, LAB, and YCrCb color spaces, we can clearly understand the role each channel plays in capturing aspects like hue, brightness, saturation, and chrominance.
Function and Syntax
Color spaces are specific organisations of colors that allow us to consistently represent and reproduce colors. A color model, on the other hand, is an abstract method of numerically representing colors in the color space. As a whole, a color space defines both the color model and the abstract mapping function used to define actual colors.
cvtColor()
In OpenCV, color space conversion is performed using the cvtColor() function, which allows seamless transformation of images between RGB, HSV, LAB, and YCrCb with just a single line of code.
Python
output_image = cv2.cvtColor(input_image, color_conversion_code)
C++
cv::Mat output_image;
cv::cvtColor(input_image, output_image, color_conversion_code);
- input_image: The source image you want to convert (should be a valid OpenCV image matrix).
- output_image (C++ only): The destination matrix where the result will be stored.
- color_conversion_code: The flag that tells OpenCV which color space conversion to apply.
In this article we’ll be discussing the five main color spaces you’ll come across when developing computer vision applications
Grayscale
It isn’t actually a color space — it’s simply the grayscale representation of an RGB image. Grayscale images and videos are a type of image representation where each pixel contains only the intensity (brightness) of light, without any
color information. In a grayscale video, all the color information is removed, leaving only varying shades of gray. This makes grayscale videos more efficient in terms of storage and processing. Grayscale images are not binary images.
Python
rgb = cv2.cvtColor(bgr_image, cv2.COLOR_BGR2GRAY)
C++
cv::Mat rgb;
cv::cvtColor(bgr_image, rgb, cv::COLOR_BGR2GRAY);
When converting to grayscale, each RGB channel is not weighted uniformly. Instead, we weight each channel differently to account for how much color we perceive of each:

Python
import cv2

# --- SETTINGS ---
video_path = "C:/Users/ssabb/Downloads/IMG_5477.mp4"
output_file = 'grayscale_video.mp4'

# --- VIDEO INPUT and OUTPUT ---
cap = cv2.VideoCapture(video_path)
fps = cap.get(cv2.CAP_PROP_FPS)
size = (int(cap.get(cv2.CAP_PROP_FRAME_WIDTH)), int(cap.get(cv2.CAP_PROP_FRAME_HEIGHT)))
out = cv2.VideoWriter(output_file, cv2.VideoWriter_fourcc(*'mp4v'), fps, size, isColor=False)

# --- PROCESS FRAMES ---
while cap.isOpened():
    ret, frame = cap.read()
    if not ret:
        break
    # Convert to grayscale and write to output
    out.write(cv2.cvtColor(frame, cv2.COLOR_BGR2GRAY))

# --- CLEAN UP ---
cap.release()
out.release()
print(f"Grayscale video saved to {output_file}")
C++
#include <opencv2/opencv.hpp>
int main() {

    // --- SETTINGS ---
    cv::VideoCapture cap("C:/Users/ssabb/Downloads/IMG_5477.mp4");
    if (!cap.isOpened()) return -1;
    int fps = static_cast<int>(cap.get(cv::CAP_PROP_FPS));
    cv::Size size(static_cast<int>(cap.get(cv::CAP_PROP_FRAME_WIDTH)), static_cast<int>(cap.get(cv::CAP_PROP_FRAME_HEIGHT)));
    cv::VideoWriter out("grayscale_video.mp4", cv::VideoWriter::fourcc('m', 'p', '4', 'v'), fps, size, false);
    cv::Mat frame, gray;
    while (cap.read(frame)) {
        cv::cvtColor(frame, gray, cv::COLOR_BGR2GRAY);  // Convert to grayscale
        out.write(gray);  // Write grayscale frame
    }

    cap.release();
    out.release();
    return 0;
}
Grayscale images are single channel images with pixel values in the range [0, 255] (i.e., 256 unique values). True black and white images are called binary images and thus only have two possible values: 0 or 255 (i.e., only 2 unique values).
Output
The grayscale video will consist of shades of gray, where each pixel represents the intensity of light at that location in the image. The colors are stripped away, and only brightness information is preserved.
RGB(Red Green Blue Color space)
RGB stands for Red, Green, Blue. In RGB, an image is composed of three channels:
- R (Red): Intensity of red color.
- G (Green): Intensity of green color.
- B (Blue): Intensity of blue color.
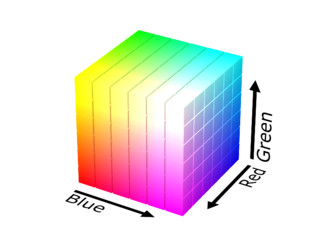
All colors are formed by combining these three channels in different intensities. RGB is highly sensitive to lighting variations; the same object may appear different under different light conditions. Images are read in BGR order by default in OpenCV, not RGB!
If you want BGR → RGB (just for proper color display in libraries like matplotlib):
Python
rgb = cv2.cvtColor(bgr_image, cv2.COLOR_BGR2RGB)
C++
cv::Mat rgb;
cv::cvtColor(bgr_image, rgb, cv::COLOR_BGR2RGB);
To define a color in the RGB color model, all we need to do is define the amount of Red, Green, and Blue contained in a single pixel. Each Red, Green, and Blue channel can have values defined in the range [0, 255], where 0 indicates no representation and 255 demonstrates full representation. The RGB color space is an example of an additive color space: the more of each color is added, the brighter the pixel becomes and the closer it comes to white. And adding all three red, green, and blue together we create white.
Python
import cv2
import os

# --- SETTINGS ---
video_path = "output_channels/color_sp.mp4"  # Replace with your input
output_folder = "output_videos"
os.makedirs(output_folder, exist_ok=True)

# --- VIDEO INPUT ---
cap = cv2.VideoCapture(video_path)
fps = cap.get(cv2.CAP_PROP_FPS)
width = int(cap.get(cv2.CAP_PROP_FRAME_WIDTH))
height = int(cap.get(cv2.CAP_PROP_FRAME_HEIGHT))
size = (width, height)

# --- VIDEO WRITERS ---
bgr_writer = cv2.VideoWriter(
    os.path.join(output_folder, 'bgr_saved.mp4'),
    cv2.VideoWriter_fourcc(*'mp4v'),
    fps, size)
rgb_writer = cv2.VideoWriter(
    os.path.join(output_folder, 'rgb_saved.mp4'),
    cv2.VideoWriter_fourcc(*'mp4v'),
    fps, size)

# --- PROCESS FRAMES ---
while True:
    ret, frame = cap.read()
    if not ret:
        break

    # Save the original BGR frame
    bgr_writer.write(frame)

    # Convert frame to RGB
    rgb_frame = cv2.cvtColor(frame, cv2.COLOR_BGR2RGB)

    # Save the RGB frame
    rgb_writer.write(rgb_frame)

# --- CLEAN UP ---
cap.release()
bgr_writer.release()
rgb_writer.release()
print("Videos saved successfully in:", output_folder)
C++
#include <opencv2/opencv.hpp>
#include <iostream>

int main() {
    std::string videoPath = "input_video.mp4"; // Replace with your input
    cv::VideoCapture cap(videoPath);
    if (!cap.isOpened()) {
        std::cout << "Error opening video!" << std::endl;
        return -1;
    }
    double fps = cap.get(cv::CAP_PROP_FPS);
    int width = static_cast<int>(cap.get(cv::CAP_PROP_FRAME_WIDTH));
    int height = static_cast<int>(cap.get(cv::CAP_PROP_FRAME_HEIGHT));
    cv::Size size(width, height);
    cv::VideoWriter bgrWriter("bgr_saved.mp4", cv::VideoWriter::fourcc('m', 'p', '4', 'v'), fps, size);
    cv::VideoWriter rgbWriter("rgb_saved.mp4", cv::VideoWriter::fourcc('m', 'p', '4', 'v'), fps, size);
    cv::Mat frame, rgbFrame;
    while (true) {
        cap >> frame;
        if (frame.empty()) {
            break;
        }

        // Save the original BGR frame
        bgrWriter.write(frame);

        // Convert frame to RGB
        cv::cvtColor(frame, rgbFrame, cv::COLOR_BGR2RGB);

        // Save the RGB frame
        rgbWriter.write(rgbFrame);
    }

    cap.release();
    bgrWriter.release();
    rgbWriter.release();
    std::cout << "Videos saved successfully!" << std::endl;
    return 0;
}
When working with OpenCV, video frames are read in BGR format by default. If we convert these frames to RGB using cv2.cvtColor and save them directly with cv2.VideoWriter, the colors appear distorted during playback. This happens because VideoWriter still expects BGR frames, and writing RGB frames leads to red and blue channels being swapped. As a result, the saved RGB video shows incorrect colors, while the BGR video appears normal since it maintains OpenCV’s native format.


Output
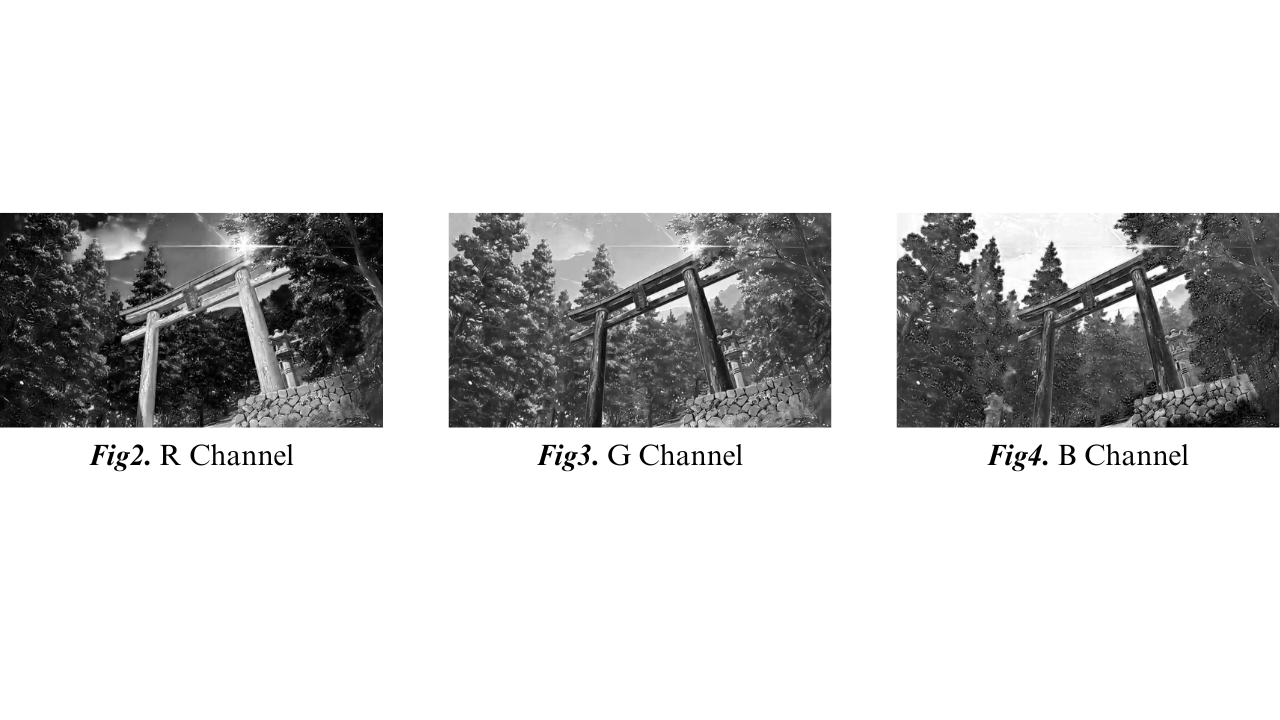
This is not exactly the most friendly color space for developing computer vision based applications. In fact, its primary use is to display colors on a monitor. Below are the images of a particular frame from the above video showing how different the image looks in different channel.
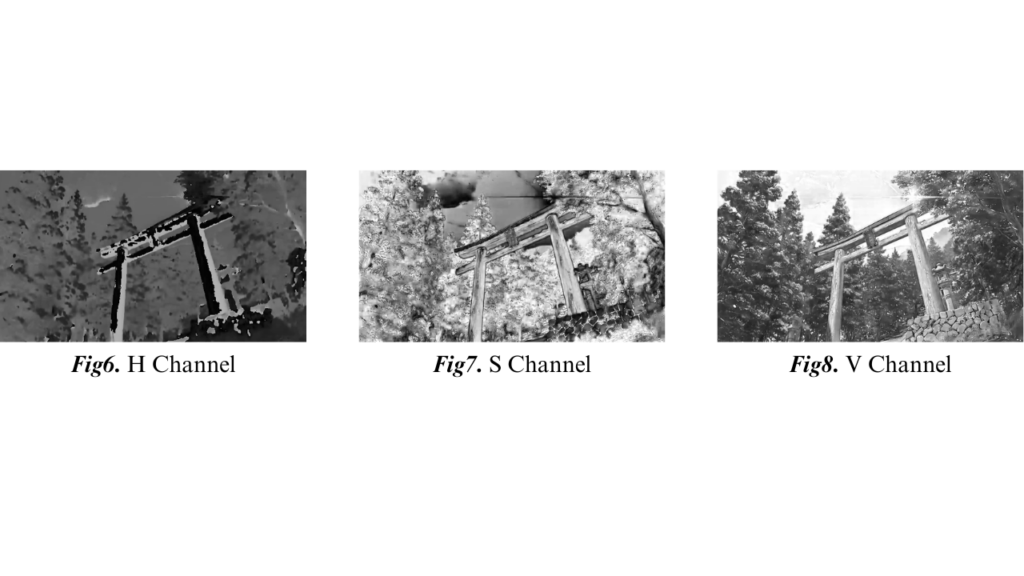
HSV (Hue Saturation Value Color Space)
HSV stands for Hue, Saturation, Value. It separates color (hue) from intensity (value).
- H (Hue): Type of color (angle on the color wheel, 0–179 in OpenCV). Which “pure” color we are examining. For example, all shadows and tones of the color “red” will have the same Hue.
- S (Saturation): Intensity or purity of the color (0–255). How “white” the color is. A fully saturated color would be “pure,” as in “pure red.” And a color with zero saturation would be pure white.
- V (Value): Brightness of the color (0–255). The Value allows us to control the lightness of our color. A Value of zero would indicate pure black, whereas increasing the value would produce lighter colors.
Makes it easier to detect and filter colors, even if lighting changes. It is closer to how humans perceive colors and is often called a cylindrical representation of RGB.
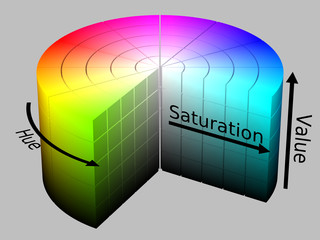
The Hue value is defined as the range [0, 179] (for a total of 180 possible values, since [0, 359] is not possible for an 8-bit unsigned array) — the Hue is actually a degree (![]() ) on the HSV color cylinder. And both saturation and value are defined on the range [0, 255].
) on the HSV color cylinder. And both saturation and value are defined on the range [0, 255].
Python
hsv = cv2.cvtColor(bgr_image, cv2.COLOR_BGR2HSV)
C++
cv::Mat hsv;
cv::cvtColor(bgr_image, hsv, cv::COLOR_BGR2HSV);
Great for color-based segmentation and detection tasks (like tracking a green object regardless of light changes). Hue is independent of lighting, making color recognition more reliable.
Python
import cv2
import os

# --- SETTINGS ---
video_path = "output_channels/color_sp.mp4"  # Change your input video name
output_path = "output_hsv.mp4"

# --- VIDEO INPUT ---
cap = cv2.VideoCapture(video_path)
fps = cap.get(cv2.CAP_PROP_FPS)
width = int(cap.get(cv2.CAP_PROP_FRAME_WIDTH))
height = int(cap.get(cv2.CAP_PROP_FRAME_HEIGHT))
size = (width, height)

# --- VIDEO WRITER ---
fourcc = cv2.VideoWriter_fourcc(*'mp4v')
out = cv2.VideoWriter(output_path, fourcc, fps, size, isColor=True)

# --- PROCESS FRAMES ---
while True:
    ret, frame = cap.read()
    if not ret:
        break
    hsv_frame = cv2.cvtColor(frame, cv2.COLOR_BGR2HSV)
    out.write(hsv_frame)  # Save HSV frame directly

# --- CLEAN UP ---
cap.release()
out.release()
print("HSV video saved successfully!")
C++
#include <opencv2/opencv.hpp>
using namespace cv;
int main() {

    // --- SETTINGS ---
    std::string videoPath = "input_video.mp4"; // Change your input video name
    std::string outputPath = "output_hsv.mp4";

    // --- VIDEO INPUT ---
    VideoCapture cap(videoPath);
    if (!cap.isOpened()) return -1;
    double fps = cap.get(CAP_PROP_FPS);
    int width = static_cast<int>(cap.get(CAP_PROP_FRAME_WIDTH));
    int height = static_cast<int>(cap.get(CAP_PROP_FRAME_HEIGHT));
    Size size(width, height);

    // --- VIDEO WRITER ---
    VideoWriter writer(outputPath, VideoWriter::fourcc('m','p','4','v'), fps, size, true);

    // --- PROCESS FRAMES ---
    Mat frame, hsv_frame;
    while (true) {
        cap >> frame;
        if (frame.empty()) break;
        cvtColor(frame, hsv_frame, COLOR_BGR2HSV);
        writer.write(hsv_frame); // Save HSV frame directly
    }

    // --- CLEAN UP ---
    cap.release();
    writer.release();
    printf("HSV video saved successfully!\n");
    return 0;
}
Output
HSV video appears unusual because HSV color space is primarily used for image processing tasks like segmentation or color-based filtering, and not for direct visual representation. Below are the images of a particular frame from the above video showing how different the image looks in different channel.
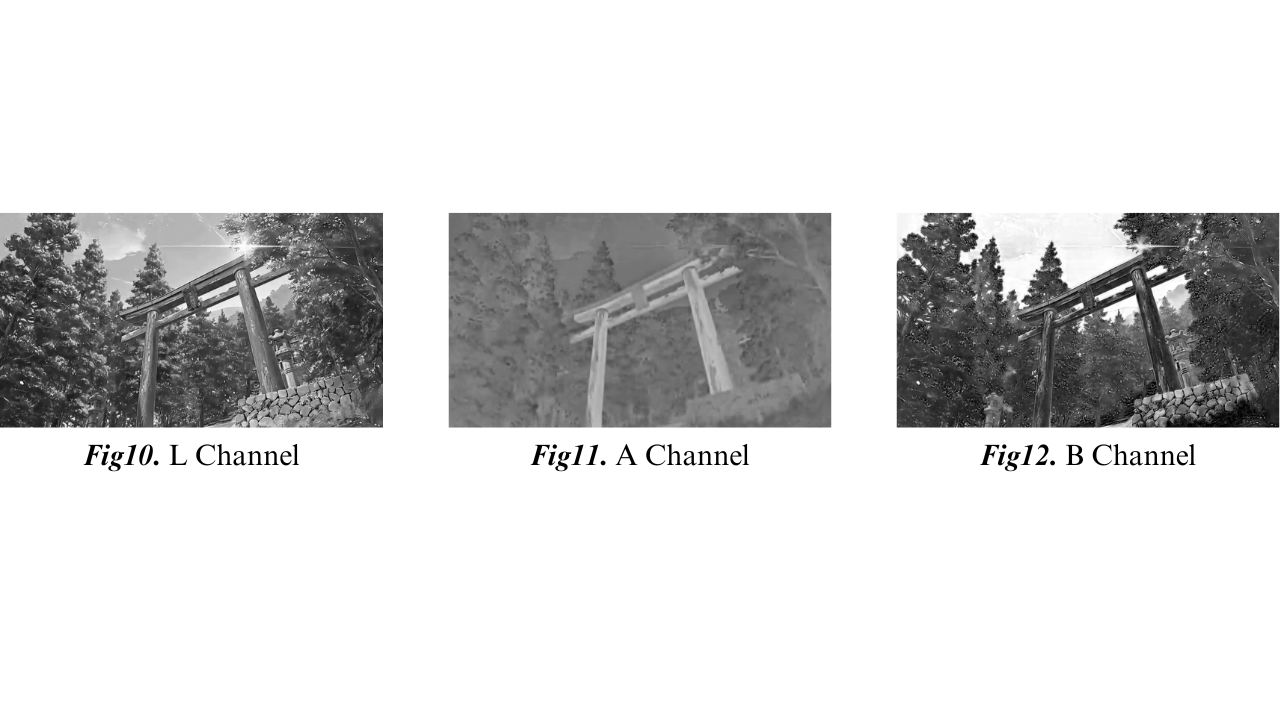
LAB (Lightness A-Channel B-Channel Color Space)
LAB stands for Lightness, A, B. Designed to be perceptually uniform, meaning small changes correspond to small perceived changes. Its goal is to mimic the methodology in which humans see and interpret color.
- L (Lightness): Brightness of the image (0–100 range but mapped to 0–255 in OpenCV).
- A (Green–Red): Positive values indicate red, negative values indicate green.
- B (Blue–Yellow): Positive values indicate yellow, negative values indicate blue.
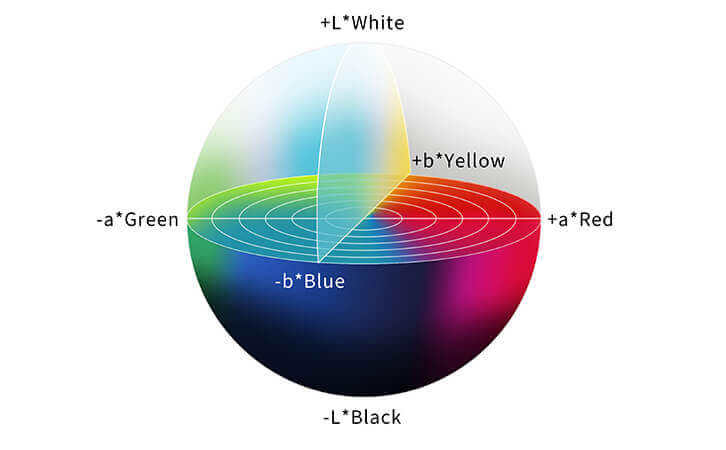
The Euclidean distance between two arbitrary colors in the Lab color space has actual perceptual meaning. The addition of perceptual meaning makes the Lab color space less intuitive and understanding as RGB and HSV, but it is heavily used in computer vision.
Useful for color correction, image enhancement, and histogram equalization.
Python
lab = cv2.cvtColor(bgr_image, cv2.COLOR_BGR2LAB)
C++
cv::Mat lab;
cv::cvtColor(bgr_image, lab, cv::COLOR_BGR2LAB);
LAB can separate lighting information (L) from color information (A, B), which helps in illumination-invariant applications.
Python
import cv2

# --- SETTINGS ---
video_path = "C:/Users/ssabb/Downloads/IMG_5477.mp4"  # Change to your input video
output_video = "lab_video.mp4"

# --- VIDEO INPUT ---
cap = cv2.VideoCapture(video_path)
fps = cap.get(cv2.CAP_PROP_FPS)
width = int(cap.get(cv2.CAP_PROP_FRAME_WIDTH))
height = int(cap.get(cv2.CAP_PROP_FRAME_HEIGHT))
size = (width, height)

# --- VIDEO WRITER ---
fourcc = cv2.VideoWriter_fourcc(*'mp4v')
out = cv2.VideoWriter(output_video, fourcc, fps, size)

# --- PROCESS FRAMES ---
while True:
    ret, frame = cap.read()
    if not ret:
        break

    # Convert frame to LAB color space
    lab_frame = cv2.cvtColor(frame, cv2.COLOR_BGR2LAB)

    # Write the LAB frame to the output video
    out.write(lab_frame)

# --- CLEAN UP ---
cap.release()
out.release()
print(f"LAB video saved as {output_video}")
C++
#include <opencv2/opencv.hpp>
#include <iostream>
int main() {

    // --- SETTINGS ---
    std::string videoPath = "C:/Users/ssabb/Downloads/IMG_5477.mp4";  // Change to your input video
    std::string outputVideo = "lab_video.mp4";

    // --- VIDEO INPUT ---
    cv::VideoCapture cap(videoPath);
    if (!cap.isOpened()) {
        std::cerr << "Error: Cannot open video file." << std::endl;
        return -1;
    }
    int fps = cap.get(cv::CAP_PROP_FPS);
    int width = cap.get(cv::CAP_PROP_FRAME_WIDTH);
    int height = cap.get(cv::CAP_PROP_FRAME_HEIGHT);
    cv::Size size(width, height);

    // --- VIDEO WRITER ---
    cv::VideoWriter out(outputVideo, cv::VideoWriter::fourcc('m', 'p', '4', 'v'), fps, size);

    // --- PROCESS FRAMES ---
    cv::Mat frame, labFrame;
    while (true) {
        cap >> frame;
        if (frame.empty()) {
            break;
        }

        // Convert frame to LAB
        cv::cvtColor(frame, labFrame, cv::COLOR_BGR2LAB);

        // Write the LAB frame to output video
        out.write(labFrame);
    }

    // --- CLEAN UP ---
    cap.release();
    out.release();
    std::cout << "LAB video saved as " << outputVideo << std::endl;
    return 0;
}
Output
The video will appear as unusual color patterns, with varying intensities of lightness, green-red, and blue-yellow channels. The resulting video will not look natural, as it represents the color information in a way that is useful for processing and analysis, not for direct display. Below are the images of a particular frame from the above video showing how different the image looks in different channel.
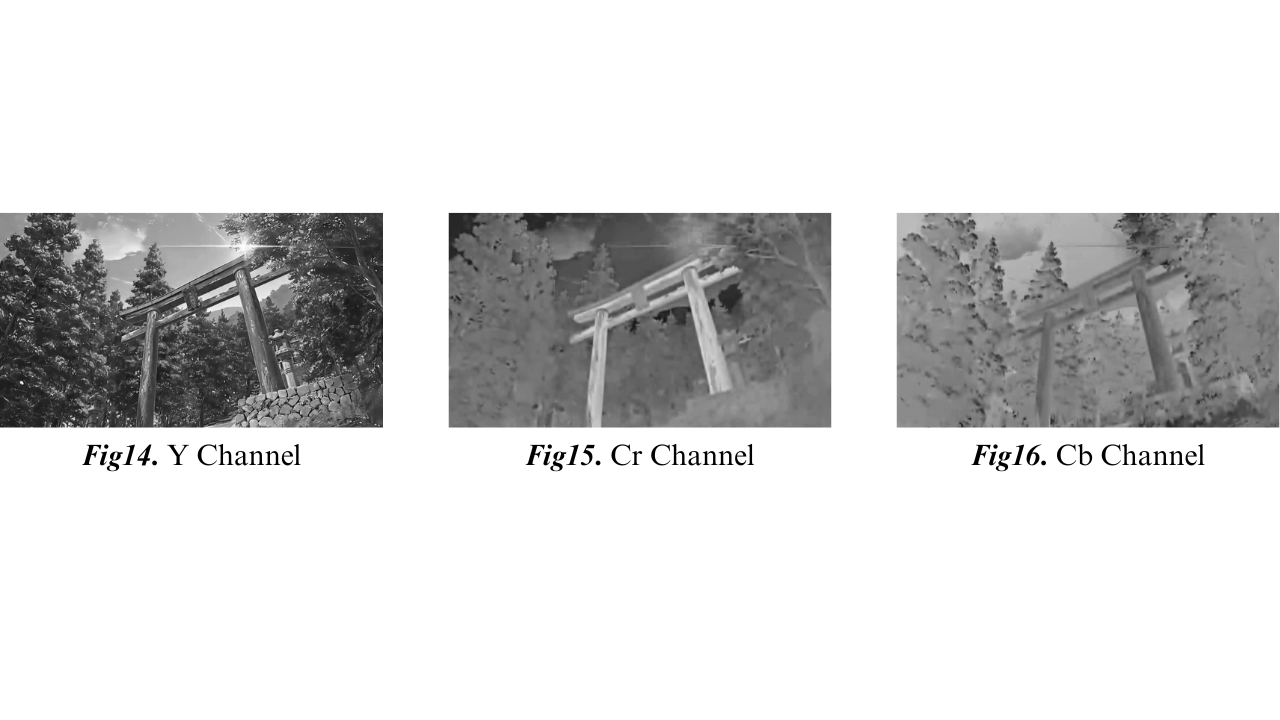
YCrCb (Luminance Chrominance Red Chrominance Blue Color Space)
YCrCb separates the image into luma or luminance (brightness) and chrome or chrominance (color). Green is naturally included as part of brightness because it’s the color people are most sensitive to. By storing luma and chroma data separately, compression algorithms can retain more luma since humans are most sensitive to it and drop chroma.
- Y (Luminance): Brightness information (grayscale image).
- Cr (Chrominance-Red): Red difference (how much red).
- Cb (Chrominance-Blue): Blue difference (how much blue).
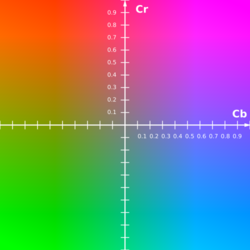
Commonly used in videos and digital photography that separates brightness (luma) from chroma (color).
Python
ycrcb = cv2.cvtColor(bgr_image, cv2.COLOR_BGR2YCrCb)
C++
cv::Mat ycrcb;
cv::cvtColor(bgr_image, ycrcb, cv::COLOR_BGR2YCrCb);
Very effective in compression (like in JPEGs, where chroma information can be compressed more than luma without noticeable loss). Useful for skin detection (skin tones cluster well in Cr and Cb channels).
Python
import cv2

# --- SETTINGS ---
video_path = "C:/Users/ssabb/Downloads/IMG_5477.mp4"  # Change to your input video
output_file = 'ycrcb_video.mp4'

# --- VIDEO INPUT ---
cap = cv2.VideoCapture(video_path)
fps = cap.get(cv2.CAP_PROP_FPS)
width = int(cap.get(cv2.CAP_PROP_FRAME_WIDTH))
height = int(cap.get(cv2.CAP_PROP_FRAME_HEIGHT))
size = (width, height)

# --- VIDEO WRITER ---
fourcc = cv2.VideoWriter_fourcc(*'mp4v')  # Using mp4v codec
out = cv2.VideoWriter(output_file, fourcc, fps, size)

# --- PROCESS FRAMES ---
while True:
    ret, frame = cap.read()
    if not ret:
        break

    # Convert to YCrCb color space
    ycrcb = cv2.cvtColor(frame, cv2.COLOR_BGR2YCrCb)

    # Write YCrCb video frame
    out.write(ycrcb)

# --- CLEAN UP ---
cap.release()
out.release()
print(f"YCrCb video saved to {output_file}")
C++
#include <opencv2/opencv.hpp>
int main() {

    // --- SETTINGS ---
    std::string video_path = "C:/Users/ssabb/Downloads/IMG_5477.mp4";  // Change to your input video
    std::string output_file = "ycrcb_video.mp4";

    // --- VIDEO INPUT ---
    cv::VideoCapture cap(video_path);
    if (!cap.isOpened()) {
        std::cout << "Error opening video file!" << std::endl;
        return -1;
    }
    double fps = cap.get(cv::CAP_PROP_FPS);
    int width = static_cast<int>(cap.get(cv::CAP_PROP_FRAME_WIDTH));
    int height = static_cast<int>(cap.get(cv::CAP_PROP_FRAME_HEIGHT));
    cv::Size size(width, height);

    // --- VIDEO WRITER ---
    cv::VideoWriter out(output_file, cv::VideoWriter::fourcc('m', 'p', '4', 'v'), fps, size);

    // --- PROCESS FRAMES ---
    cv::Mat frame, ycrcb;
    while (true) {
        cap >> frame;
        if (frame.empty())
            break;

        // Convert to YCrCb color space
        cv::cvtColor(frame, ycrcb, cv::COLOR_BGR2YCrCb);

        // Write YCrCb video frame
        out.write(ycrcb);
    }

    // --- CLEAN UP ---
    cap.release();
    out.release();
    std::cout << "YCrCb video saved to " << output_file << std::endl;
    return 0;
}
Output
The output will appear to have unnatural colors, with the luminance channel influencing brightness and the chrominance channels affecting color saturation and hue. Below are the images of a particular frame from the above video showing how different the image looks in different channel.
Summary
In this article, we explored the fascinating world of color spaces. We started by understanding what color spaces are, why they are important in computer vision, and how different lighting conditions can dramatically affect how images are perceived. Using an anime video as our example, we demonstrated how to split videos into individual color channels across four major color spaces: RGB, HSV, LAB, and YCrCb.
If you enjoy working with images and want to dive deeper into building AI models that understand visuals even better, check out our free TensorFlow and Keras Bootcamp — it’s the perfect next step to level up your computer vision skills!


5K+ Learners
Join Free VLM Bootcamp3 Hours of Learning